SMR is simply a self-deep tissue massage, which works out the knots in your muscles to help correct muscle imbalances in your body, which will reduce injuries.
By performing Self-Myofascial Release techniques on a simple piece of foam, you can improve flexibility, function, and performance, which decreases the risk of injuries. In a nutshell, you use your body weight to roll on the round foam roll, massaging away restrictions to normal soft-tissue extensibility. And you can perform this program at home, maximizing your recovery time.
Benefits of Self-Myofascial Release
- Correct muscle imbalances
- Increase joint range of motion
- Reduce muscle soreness
- Relieve everyday joint stress
- Maintain functional muscular length
General Guidelines
- Spend 1-2 minutes on each side(can do more)
- If there is a tender spot, stop rolling and hold on that area for 20-45 seconds or until the muscle relaxes. On a scale of 1-10, 10 being the worst pain, you want to stay between a 3 and 7. If you continue to roll when pain is present, you will activate the muscle spindles causing increased tightness and pain.
- Maintain an engaged core to support the spine and hip complex.
- Can perform 1-2 times a day.
Contradictions
Do not use Self Myofascial Release Techniques without consulting your physician if you have any of the following conditions.
- Osteoporosis
- Diabetes
- Arthritis
- Cancer
- Varicose Veins
- Pregnant
Once you have consulted with your physician, you and your physician will be able to have a plan as to what foam rolling exercises you can safely perform based on any health conditions you may have.
Once you have consulted with your physician you and your physician will be able to have a plan as to what foam rolling exercises you can safely perform.
IT BAND
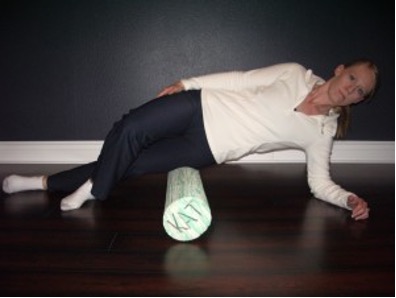
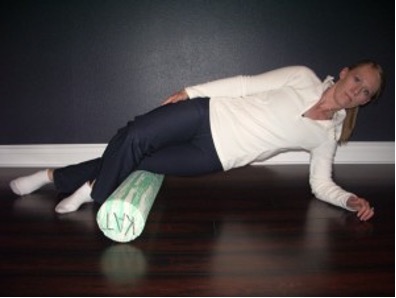
Position yourself side lying on the foam roller. The bottom leg is resting on the floor. Maintain head in a neutral position with ears aligned with shoulders. Roll just below the hip joint down the lateral thigh to the knee.
TENSOR FASCIA LATAE (TFL)
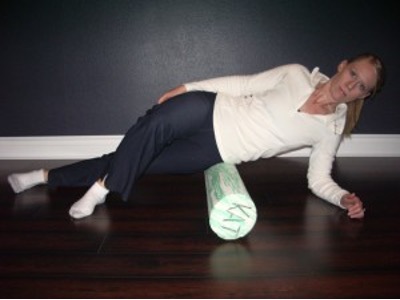
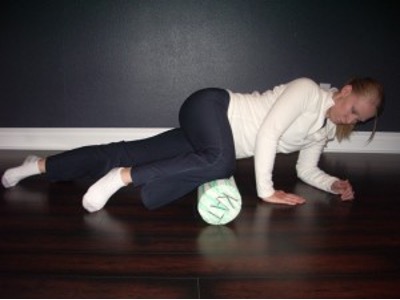
Position yourself on your side, with good support in your shoulder. Find the little grove between the top and bottom hip bone. Maintain neutral position abs drawn in. Roll just above the bottom of the hip bone toward the top of the hip bone. There will be minimal movement when rolling as this is a small muscle. Once you release all the knots in this muscle, you can target other areas by starting back at the bottom hip bone, leaning slightly forward, and repeating the above moment. You can also roll backward some and repeat the below movement.
ADDUCTORS
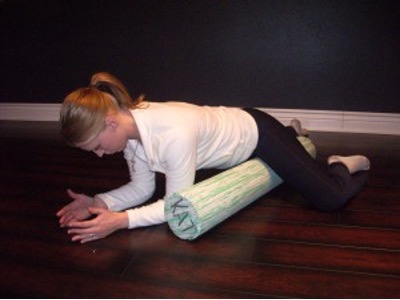
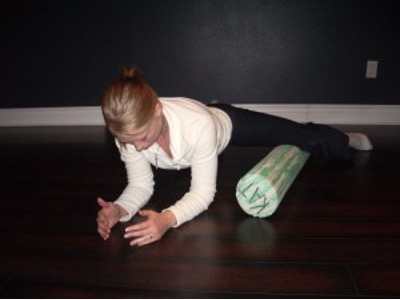
Extend the thigh keeping the knee bent, and place foam roll in the groin region with the body prone (stomach faces down) on the floor. Be cautious when rolling near the adductor-complex origins at the pelvis. You do not want to strain the tendons and ligaments. Maintain abs drawn in with a neutral spine. Roll away from the foam roller toward the knee while keeping the back flat.
LATISSIMUS DORSI
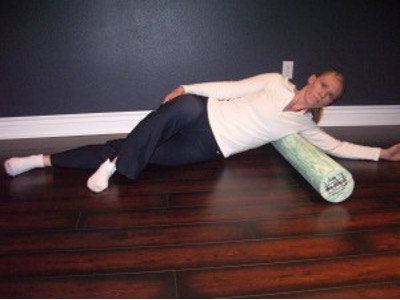
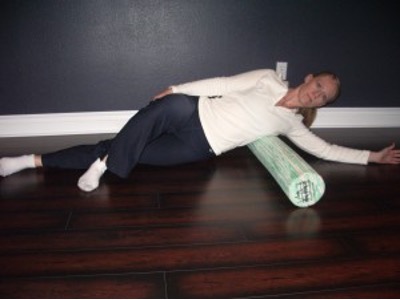
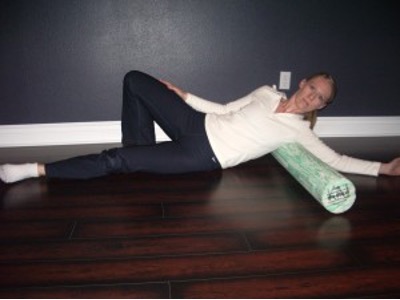
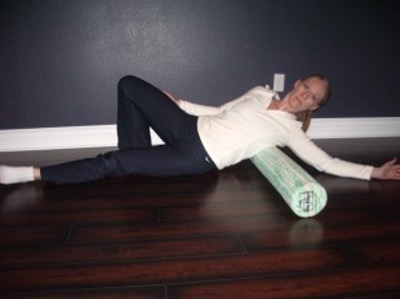
Position yourself side lying with your arm outstretched and the foam roll placed in the axillary area (grove of your armpit). Keep the thumb pointing up to pre-stretch the latissimus dorsi muscle. Your bottom leg will be straight, cross your top leg over the front and place your foot flat on the ground. Movement during this technique is only about 4 to 6 inches, never rolling onto the bottom of your ribcage. Roll toward the bottom of the ribcage, stopping shy of your floating ribs (last ribs). The end range will place the foam roller just below the chest muscles. Then start back at the top of the armpit, angle the body slightly backward, cross the top leg behind the bottom leg, and repeat the motion.
QUADRICEPS
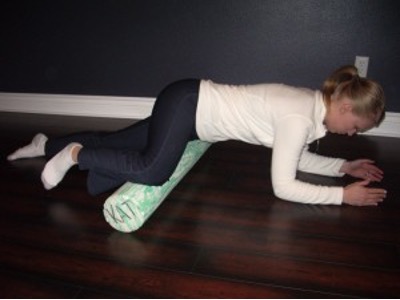
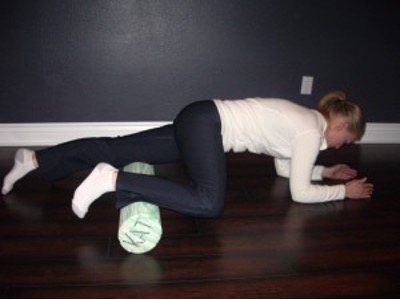
The body is positioned prone with quadriceps on the foam roller. Maintaining proper core control (abdominal Drawn-In position & tight glutes) is crucial to prevent low back compensations. Roll from pelvic bone to knee, emphasizing the front of the thigh. Then start back at the top, place one of your knees on the foam roller, and angle your body slightly away from your knee. Your focus should now be on your lateral (outside) thigh as you foam roll from the top of your leg toward the knee.
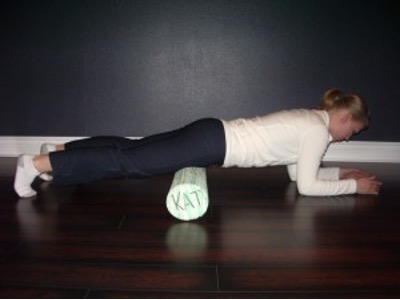
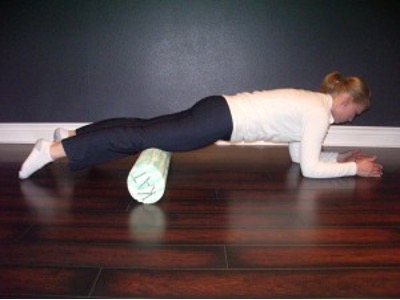
PIRIFORMIS
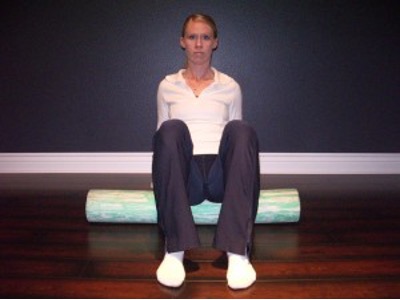
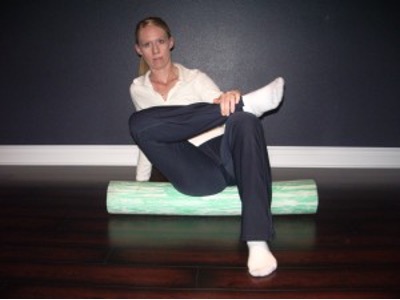
Begin by positioning yourself on the foam roller just behind your sit bones. Cross one foot to the opposite knee, supporting your ankle with your leg. Lean into the same glute as the leg you crossed over your knee. Roll on the posterior (back) hip area. Increase the stretch by pulling the knee toward the opposite shoulder or leaning more. You can decrease the intensity by moving the foot on the floor further away from the foam roller.
CHEST
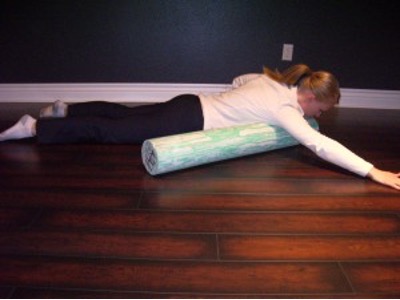
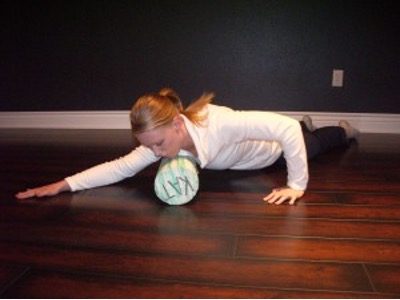
Begin by positioning yourself with the foam roller running perpendicular to your chest muscles. The chest muscles are like a fan shape starting from your shoulder and spreading toward your breast bone. Place the arm of the side you are foam rolling angled in the same direction the muscle runs. Your opposite arm holds you up in a pushup position, allowing you to add pressure to the muscle. For men: you can foam roll the entire Chest Muscle. For women: this is a little more challenging, and you can only foam roll about midway down the chest muscle. Still, maintain a neutral spine and keep your core engaged.
THORACIC SPINE
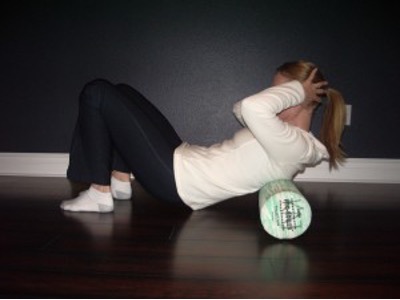
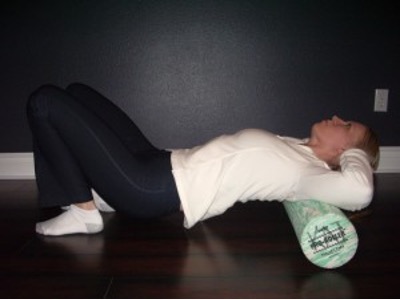
Begin by positioning the foam roller below the shoulder blades, perpendicular to your spine. Keep your back rounded up while in the start position. Then roll toward the top of the shoulder blades, be careful to avoid going too high and moving onto your cervical spine. Repeat rolling back and forth about ten times. This is one of the few foam rolling exercises where you do not hold your position on the tender spots or worry about keeping your core engaged.
CALVES
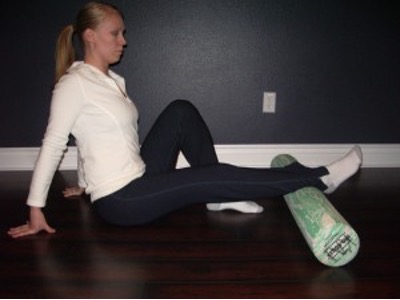
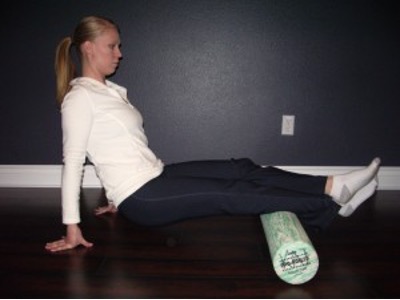
Begin by positioning the foam roller at your ankle. While keeping your core engaged and your back and chest lifted, roll toward the top of your calf (just below the knee). If you feel a lot of tender spots or your scale of 1-10 is high, keep your leg uncrossed and use your opposite leg for support, like shown below in the first picture. However, to add more pressure, you can place your opposite ankle on top of the bottom leg to create more pressure on the muscle, even pressing down.
I did not show it in pictures; however, you can turn your foot inward and foam roll the inner part of your calf. (If pregnant, do not do this, as this could result in premature labor). You may also turn your foot out and foam roll the otter part of your calf.
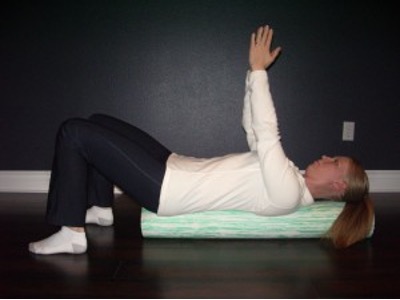
OPENING OF THE CHEST CAVITY AND ROM OF SHOULDERS
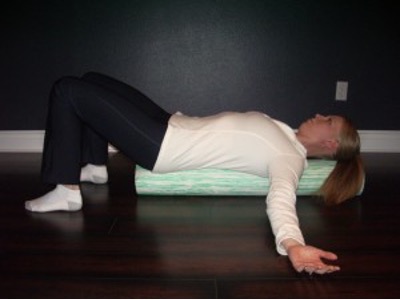
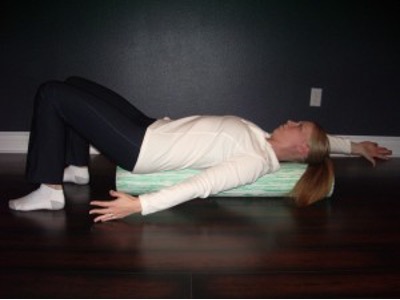
You can do a few different exercises, from lying on the foam roller this way. These will help open the chest cavity and create a range of motion (ROM) in the shoulders.
- Start by lying supine (on your back) and the center of the foam roller. Place the back of your hands flat on the ground in a comfortable cross position. After lying there for 30 seconds, open and close the arms ten times while engaging the Rhomboids (muscles between the shoulder blades) and pressing them into the foam roller.
- Start with your hands, as shown in the 2nd picture. Then while one hand pulls toward your feet with your thumb pointing toward the ceiling, the other hand reaches away from the body with the thumb pointed toward the floor. You must only go as far as the arms will allow you to go while keeping them straight. Otherwise, you will not see an increase in ROM or flexibility. Repeat this ten times on each side.
HAMSTRINGS
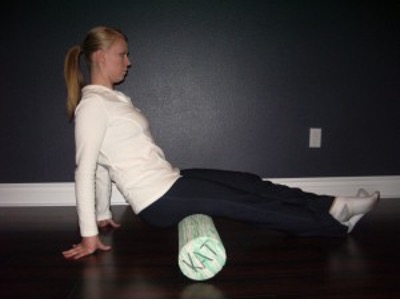
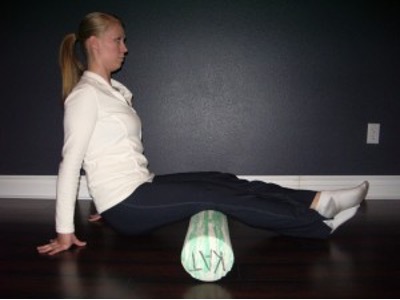
Begin by positioning the foam roller at the top of the leg, sitting up nice and tall, with the core drawn in to support the back and to take some pressure off the hands. Foam roll down the leg toward the bottom of the hamstring until you reach the top of the knee. You may not find any tender spots to stop and hold on. Usually, this is due to most individuals having overstretched hamstrings due to a sedentary lifestyle. With over 20 years of working with clients, they typically feel their hamstrings are tight due to tight calves or tight nerves stopping their range of motion. I generally do not add foam rolling the hamstrings to my clients’ program. If I do, it is only occasionally.
